Thank you for filling out the form. One of our mobile experts will be in touch shortly to discuss your inquiry.
If you have any other questions please feel free to email us directly at info@mitto.ch
Thank you for filling out the form. One of our mobile experts will be in touch shortly to discuss your inquiry.
If you have any other questions please feel free to email us directly at info@mitto.ch
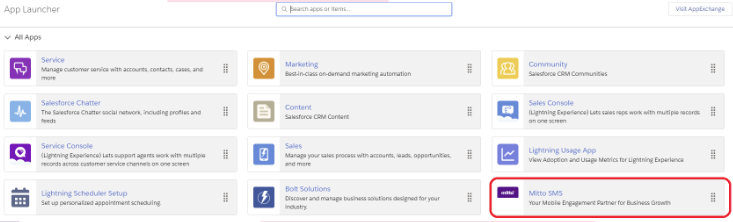
Salesforce is a cloud-based customer relationship management service that allows you to manage all customer interactions from a centralized location. Their product includes applications for communication, marketing automation, analytics, and application development. You can combine Salesforce tools and applications with Mitto SMS to add another communication channel. Mitto SMS can be used for customer service, marketing campaigns, delivery reminders and more.
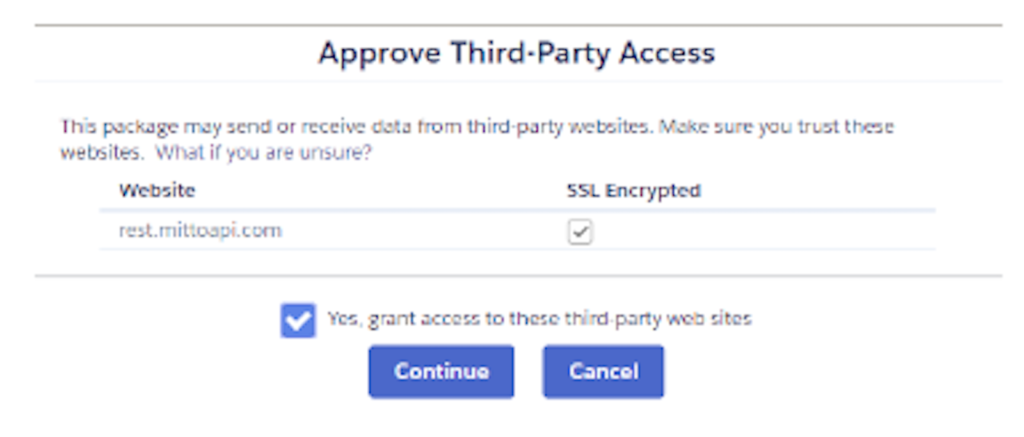
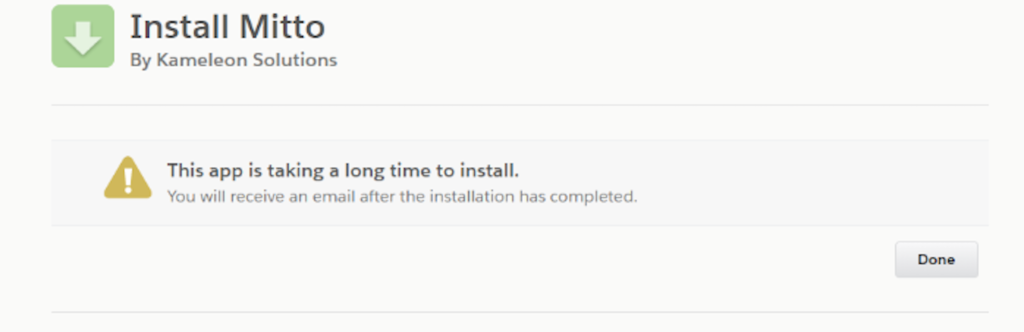
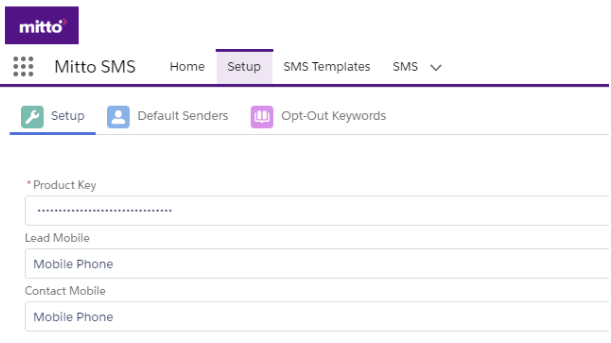
If you want to integrate Mitto with your existing Salesforce solution, take the following steps:
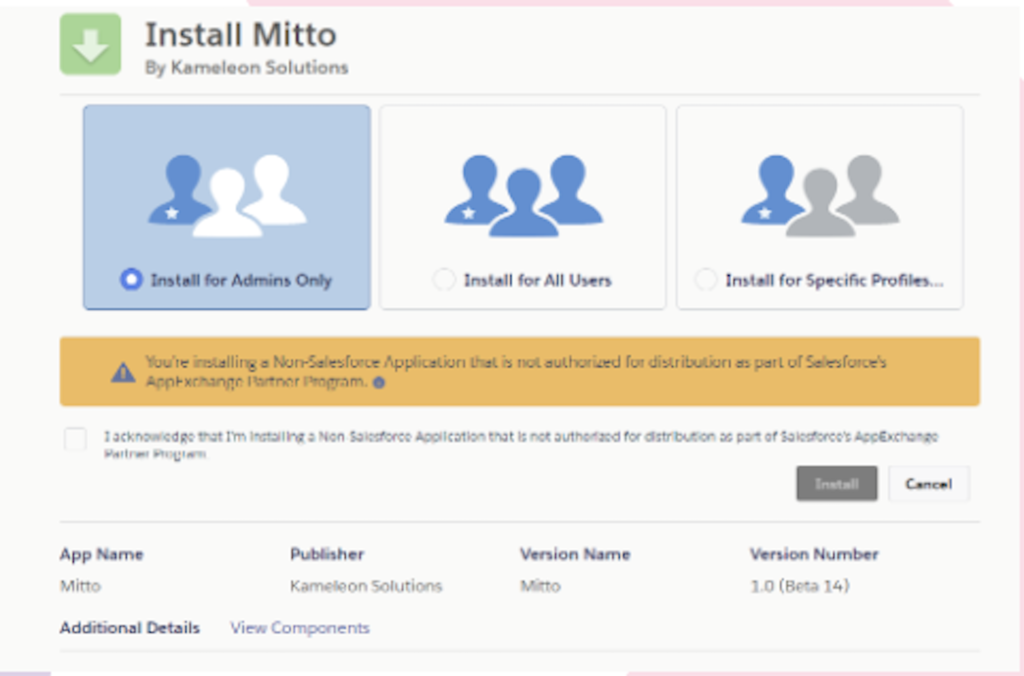
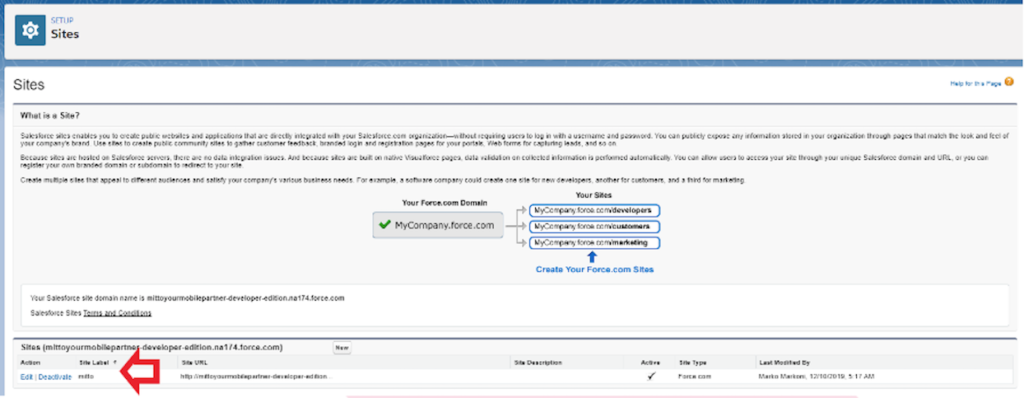
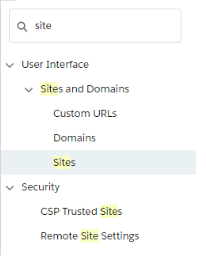
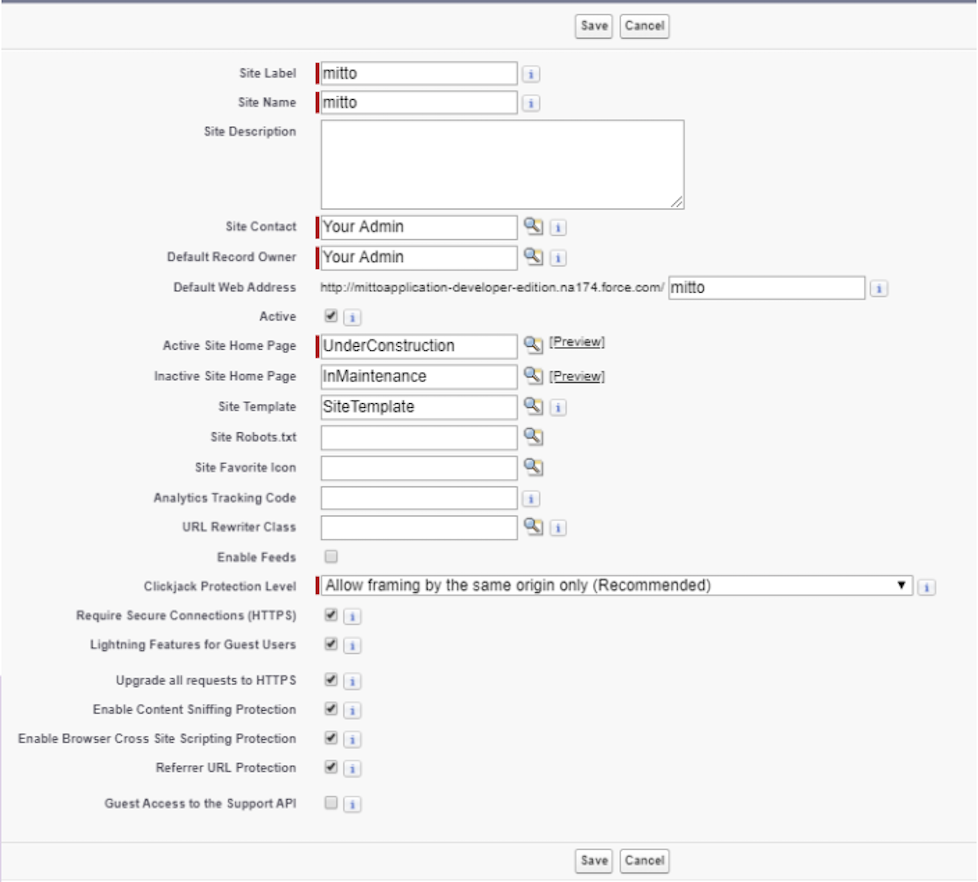
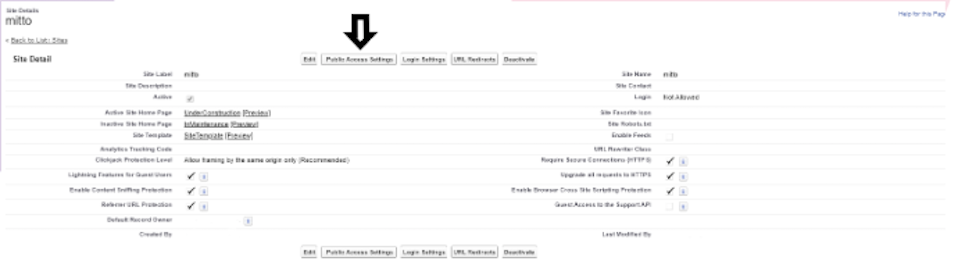
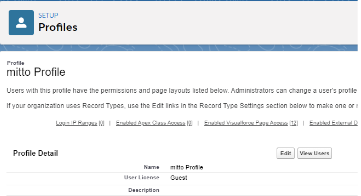
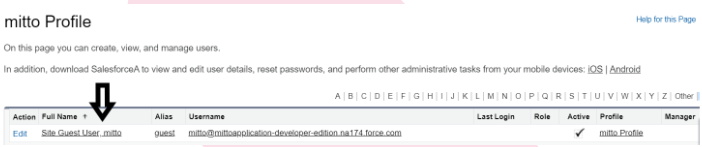
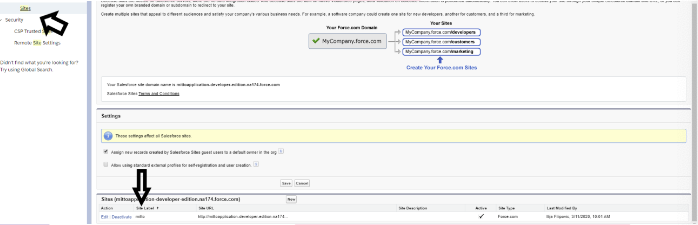
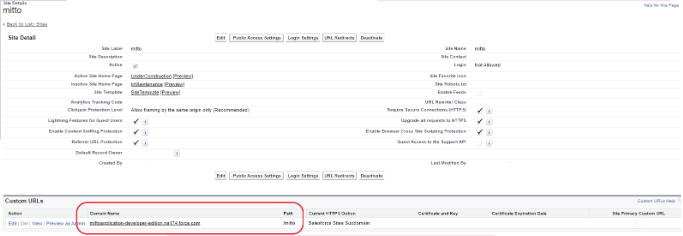
Prerequisite: your organization must have at least one Salesforce site. See Step 1 for more details.
Steps:
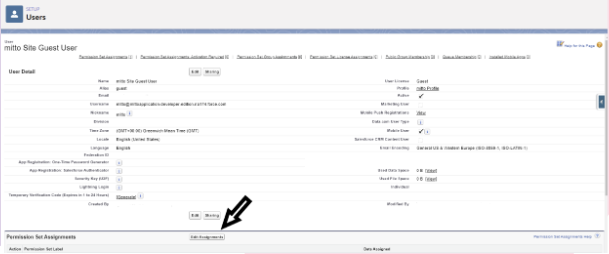

The best way to provide access to other users without compromising access to your Mitto setup options is to assign each Salesforce user a pre–defined permission set using Mitto User Access. If you would like to provide access to Mitto setup options then a separate permission set should be made or it can be done per profile.


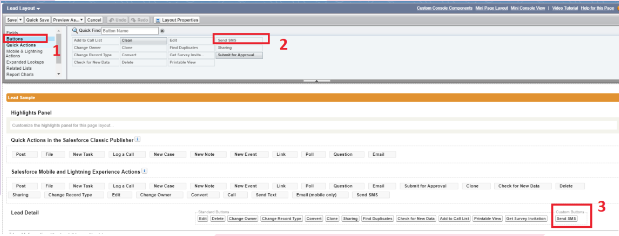
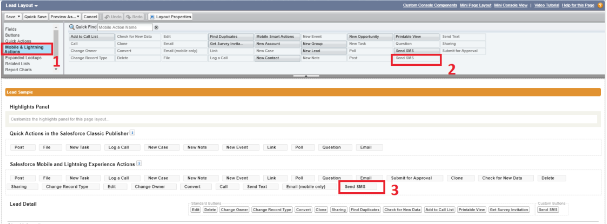
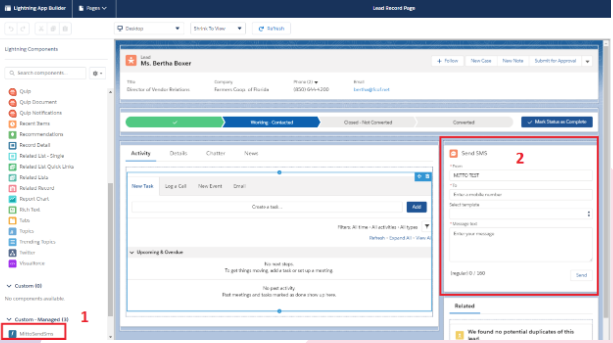
You can adjust page layouts as follows. Repeat the steps for leads, contacts and campaigns. Please note that you do not need to make both the quick action and the Mitto lightning component in Lightning available to users. Choose the option that is most convenient.
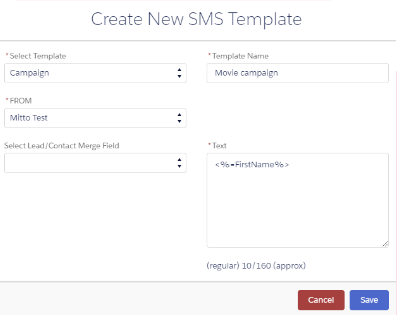
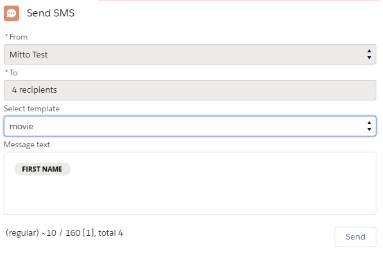
You may create SMS templates for leads, contacts or campaigns. If you would like to personalize your message use merge fields inside the template. Campaign templates can use merge fields that are applicable to both contacts and leads as campaign members.

At the bottom of each template the number of characters is calculated. It can be either Regular or Unicode. If a template has a personalization string it will show approximate number. For instance, FirstName takes 10 characters in this calculation. The real number of characters can be different when such template is used for sending SMS.
SMS records can be created in several ways. This section walks you through how to create records for Leads, Contacts, Campaigns and Custom Processes.
The same rules apply here as for leads.
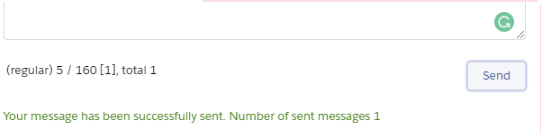
You can send SMS to all campaign members of a campaign. Navigate to a campaign record page. You may see the number of recipients. Please note the number of recipients may be less than the number of campaign members if some of your campaign members are missing value in the corresponding mobile phone field or they are marked as sms opt–out. Such campaign members cannot receive any SMS. Therefore, they are not counted against recipients of your campaign. The counter shows the number of characters followed by the limit of one SMS. This is further followed by the number of SMS in squared brackets. The final figure shows the total number of messages that should be sent.
NOTE: The actual number of messages can be different due to the personalization string. In the example below (screenshot) some campaign members may have their first name 15 characters long although this string assumes that it is 10 characters by default. That may increase the number of messages. Consult your Account Manager at Mitto for more details.
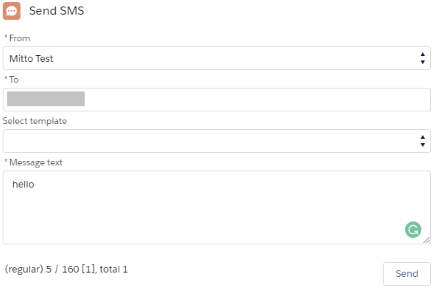
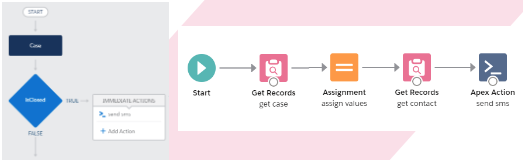
You may integrate functionality of sending SMS into your process builders, flows or APEX triggers. All you need is to call an APEX action called Mitto Send SMS(api: apex-mitto__SendSMSHelper) and provide values to its variables. See two examples below.
All created SMS can be found under the SMS tab. You may add SMS records as a related list to leads, contacts and campaigns. There is an All list view that can be used out–of–the–box. You may add list views on your own.
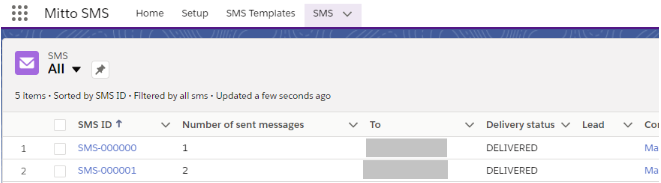
SMS records contain the most important details such as: leads, contacts and/or campaigns they are related to. The message itself with the actual number of messages sent per SMS record.
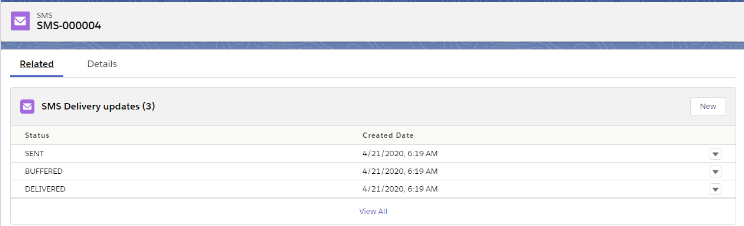
Each SMS record will be updated with changes in their status. Configure SMS page layout by adding an SMS Delivery updates related list. Please note that you must have a callback option enabled and set up for your organization.
You must first specify opt-out key words using the Setup tab. After you’ve completed that, you can add the SMS opt-out to leads and contact page layouts. Make sure to set privileges for who can edit this field.

When someone opts out, this SMS opt-out checkbox will be selected. This lead/contact will not be able to receive any messages. You may manually deselect this checkbox if you want these leads/contacts to receive messages.
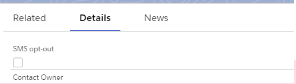
The SMS component will be disabled when someone opts out.

Opt-out messages are stored like any other SMS records. They are distinguished by Message Status. It shows: OPT–OUT.
